
Test Observability & Engineering effectiveness
“Engineering Effectiveness” has been a central topic of discussion and focus this year
Scaling Tests on Google Kubernetes Engine with Cloud Build
As we looked at how to run automation scripts in selenoid using docker and docker-compose in my previous blog. In this blog let’s dive into how to run WebdriverIO test automation scripts in scalable mode using Google Kubernetes Engine and Cloud Build.
Kubernetes is an open-source system for automating deployment, scaling, and management of containerized applications. Google Kubernetes Engine — provides a simple way to automatically deploy, scale, and manage Kubernetes. And Cloud Build — it is a serverless CI/CD platform to build, test, and deploy.
According to the documentation of Aerokube, selenoid is not recommended for the Kubernetes platform. And Moon is pay per use model. So in this article, we are going to explore Selenosis — a scalable, stateless selenium hub for the Kubernetes cluster.
Namespaces are Kubernetes objects which help in organising resources and partition a single Kubernetes cluster into multiple virtual clusters. It provides a degree of isolation from the other parts of the cluster.
					apiVersion: v1
kind: Namespace
metadata:
  name: selenosis
Service is an abstract way to expose an application running on a set of Pods as a network service. It creates a permanent IP address, the lifecycle of pod and service are not connected. Even if the pods crash and are recreated, the service IP remains the same.
					apiVersion: v1
kind: Service
metadata:
  name: selenosis
  namespace: selenosis
spec:
  externalTrafficPolicy: Cluster
  ports:
    - name: selenium
      port: 4444 # other pods in the cluster that may need to access the service will just use port
      protocol: TCP
      targetPort: 4444 # it forwards the traffic to ContainerPort (where the app might be listening)
      nodePort: 31000 # makes the service visible outside the Kubernetes cluster by the node’s IP address and the port number
  selector:
    app: selenosis
  sessionAffinity: None
  type: LoadBalancer # exposes the Service externally using a cloud provider's load balancer
---
apiVersion: v1
kind: Service
metadata:
  name: seleniferous
  namespace: selenosis
spec:
  selector:
    type: browser
  clusterIP: None
  publishNotReadyAddresses: true
Deployment describes the desired state of a pod or a replica set, then gradually updates the environment (for example, creating or deleting replicas) until the current state matches the desired state specified in the deployment file. In general, we don’t work directly with pods, we will create deployments. It is mainly for stateless apps.
					apiVersion: apps/v1
kind: Deployment
metadata:
  name: selenosis
  namespace: selenosis
spec:
  strategy: # deployment strategy used to replace existing pods with new one
    type: RollingUpdate
    rollingUpdate:
      maxSurge: 1
      maxUnavailable: 1
  replicas: 2
  selector:
    matchLabels:
      app: selenosis
  template:
    metadata:
      labels:
        app: selenosis
        selenosis.app.type: worker
      namespace: selenosis
    spec:
      containers:
        - args: [
              "/selenosis",
              "--browsers-config",
              "./config/browsers.yaml",
              "--namespace",
              "selenosis",
              "--service-name",
              "seleniferous",
              "--browser-limit",
              "50", # this specifies max number of browser allowed
              "--browser-wait-timeout",
              "3m30s",
              "--session-wait-timeout",
              "3m30s",
              "--proxy-image",
              "alcounit/seleniferous:v1.0.2",
            ]
          image: alcounit/selenosis:v1.0.5
          name: selenosis
          resources:
            limits:
              cpu: "1"
              memory: "1Gi"
            requests:
              cpu: "0.2"
              memory: "128Mi"
          ports:
            - containerPort: 4444
              name: selenium
              protocol: TCP
          volumeMounts:
            - mountPath: ./config
              name: browsers-config
          imagePullPolicy: IfNotPresent
          readinessProbe: # kubelet uses readiness probes to know when a container is ready to start accepting traffic
            httpGet:
              path: /healthz
              port: 4444
            periodSeconds: 2
            initialDelaySeconds: 30
          livenessProbe: # kubelet uses liveness probes to check if app is live
            httpGet:
              path: /healthz
              port: 4444
            periodSeconds: 2
            initialDelaySeconds: 3
      volumes:
        - name: browsers-config
          configMap:
            name: selenosis-config
Horizontal Pod Autoscaler automatically scales the number of Pods in a replication controller, deployment, replica set or stateful set based on observed CPU utilisation
					apiVersion: autoscaling/v2beta2
kind: HorizontalPodAutoscaler
metadata:
  name: selenosis
  namespace: selenosis
spec:
  maxReplicas: 10
  minReplicas: 2
  scaleTargetRef:
    apiVersion: apps/v1
    kind: Deployment
    name: selenosis
  metrics:
    - type: Resource
      resource:
        name: cpu
        target:
          type: Utilization
          averageUtilization: 60
  behavior:
    scaleDown:
      stabilizationWindowSeconds: 300
      policies:
        - type: Percent
          value: 50
          periodSeconds: 30
kubectl create cm selenosis-config --from-file=browsers.yaml=selenosis-deploy/browsers.yaml -n selenosis
Jobs used to run a finite task(which is a suitable k8s object to use for running test scripts). It will create one or more Pods and performs a given task. Once the task is completed successfully, the pod will be exited.
					apiVersion: batch/v1
kind: Job
metadata:
  name: e2e
  namespace: selenosis
spec:
  backoffLimit: 0 # Specifies the number of retries before marking this job failed.
  template:
    metadata:
      labels:
        selenosis.app.type: worker
    spec:
      containers:
        - name: e2e
          imagePullPolicy: IfNotPresent
          image: gcr.io/wdio-gke/e2e:latest
          resources:
            limits:
              cpu: "2"
              memory: "2Gi"
            requests:
              cpu: "0.5"
              memory: "512Mi"
      dnsPolicy: ClusterFirst
      restartPolicy: Never
      terminationGracePeriodSeconds: 0
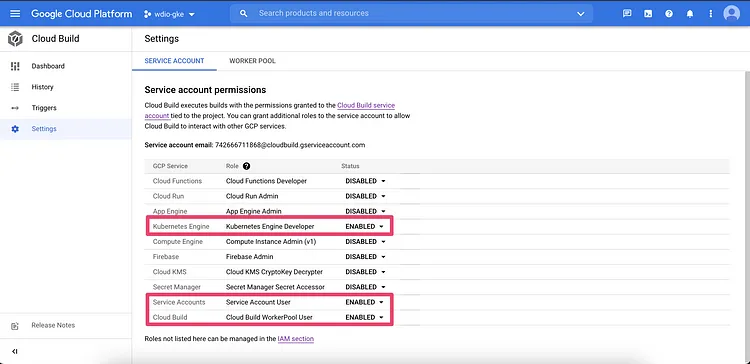
Create a new project in GCP, go to Cloud Build, enable the api. And few other settings as shown in the below picture (to follow along with this tutorial you need a cloud billing account, a free tier is sufficient). And make sure you have the required permissions in the IAM & Admin section.

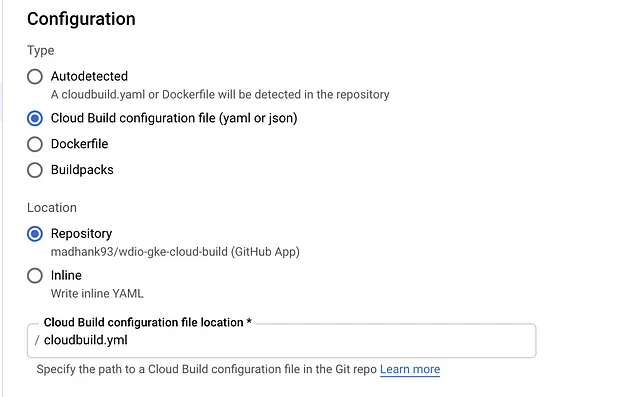
Go to Cloud Build > Triggers section, click on Create Trigger and add the details as follow. So whenever the code has been pushed to GitHub, cloud build flow will be triggered.


And finally creating cloudbuild.yml file to execute the process of building docker image from source code (e2e), pushing it to a container registry, creating a GKE cluster and finally starting e2e tests.

					steps:
  # This step builds the container image.
  - id: "Build e2e docker image"
    name: "gcr.io/cloud-builders/docker"
    args: ["build", "-t", "gcr.io/$PROJECT_ID/e2e", "."]

  # This step pushes the image to Container Registry
  # The PROJECT_ID variables are automatically
  # replaced by Cloud Build.
  - name: "gcr.io/cloud-builders/docker"
    id: "Push docker image to container registry"
    args:
      - "push"
      - "gcr.io/$PROJECT_ID/e2e"

  # This step creates a GKE cluster
  # with 1 node
  # config of 8 cpu and 32gb ram.
  - name: "gcr.io/cloud-builders/gcloud"
    id: "Create GKE cluster"
    entrypoint: "bash"
    args:
      - "-c"
      - |
        gcloud container clusters create $_CUSTOM_CLUSTER --num-nodes=1 --machine-type=e2-standard-8
    env:
      - CLOUDSDK_COMPUTE_ZONE=$_CUSTOM_ZONE

  # This step deploys selenosis setup
  # in the Kubernetes Engine cluster.
  - name: "gcr.io/cloud-builders/gke-deploy"
    id: "Deploy selenosis setup"
    entrypoint: "bash"
    args:
      - "-c"
      - |
        gcloud container clusters get-credentials $_CUSTOM_CLUSTER
        sh ./selenosis-deploy/script.sh
    env:
      - CLOUDSDK_COMPUTE_ZONE=$_CUSTOM_ZONE

  # This step deploys e2e tests
  # in the Kubernetes Engine cluster.
  - name: "gcr.io/cloud-builders/gke-deploy"
    id: "Deploy e2e"
    entrypoint: "bash"
    args:
      - "-c"
      - |
        gcloud container clusters get-credentials $_CUSTOM_CLUSTER
        kubectl apply -f e2e-test.yml
    env:
      - CLOUDSDK_COMPUTE_ZONE=$_CUSTOM_ZONE

substitutions:
  _CUSTOM_ZONE: asia-south1-a
  _CUSTOM_CLUSTER: gke-cluster
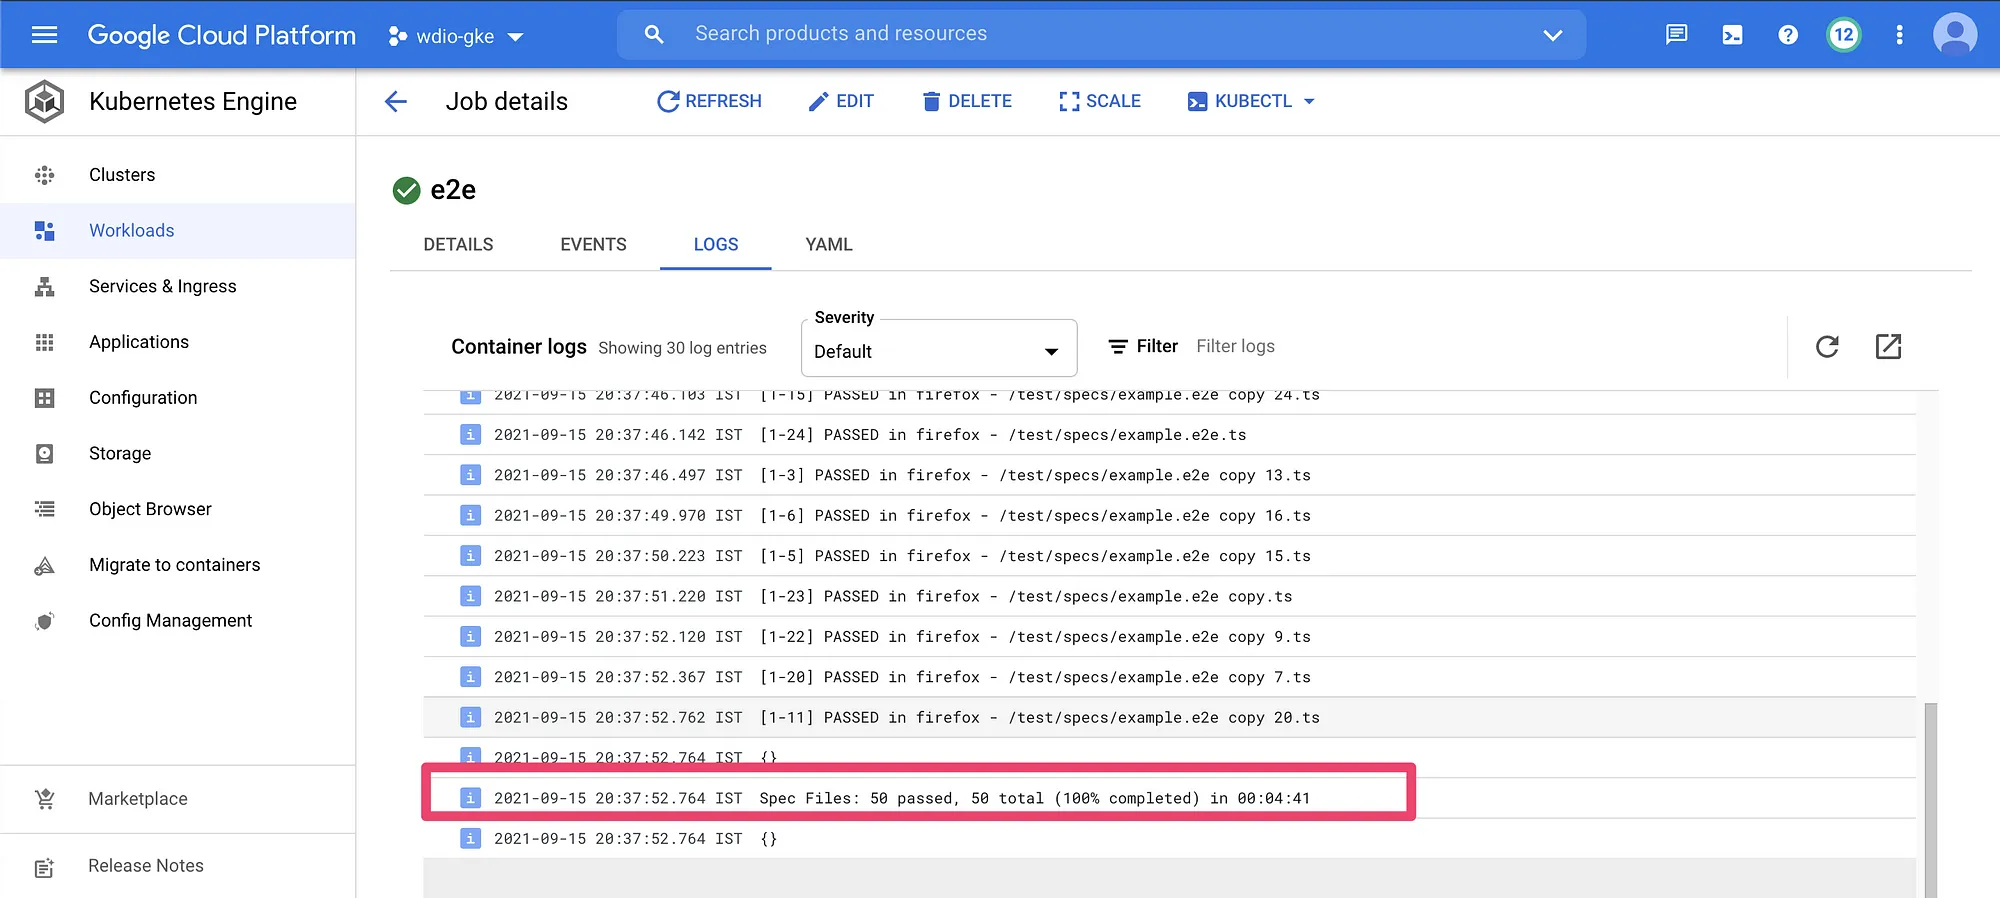
According to the cloud build settings, whenever the code has been pushed to Github repositories, execution will begin.


Running all the 25 spec/tests files in chrome and firefox browsers parallelly, and completing it all within well under 04:41 mins. More or less time remains constant since all the tests are running in parallel no matter how many tests scripts has been authored, maximum time will take to complete the whole process will the slowest of all the test.
The source code of this blog post can be found here.
References:
[1] https://github.com/alcounit/selenosis
[2] https://github.com/alcounit/selenosis-deploy
[3] https://cloud.google.com/kubernetes-engine/docs/tutorials/gitops-cloud-build
[4] https://codefresh.io/kubernetes-tutorial/single-use-daemonset-pattern-pre-pulling-images-kubernetes/
Share This Article

“Engineering Effectiveness” has been a central topic of discussion and focus this year

With us, you’re not just a part of a company; you’re part of a movement dedicated to pushing boundaries, breaking barriers, and achieving the extraordinary.
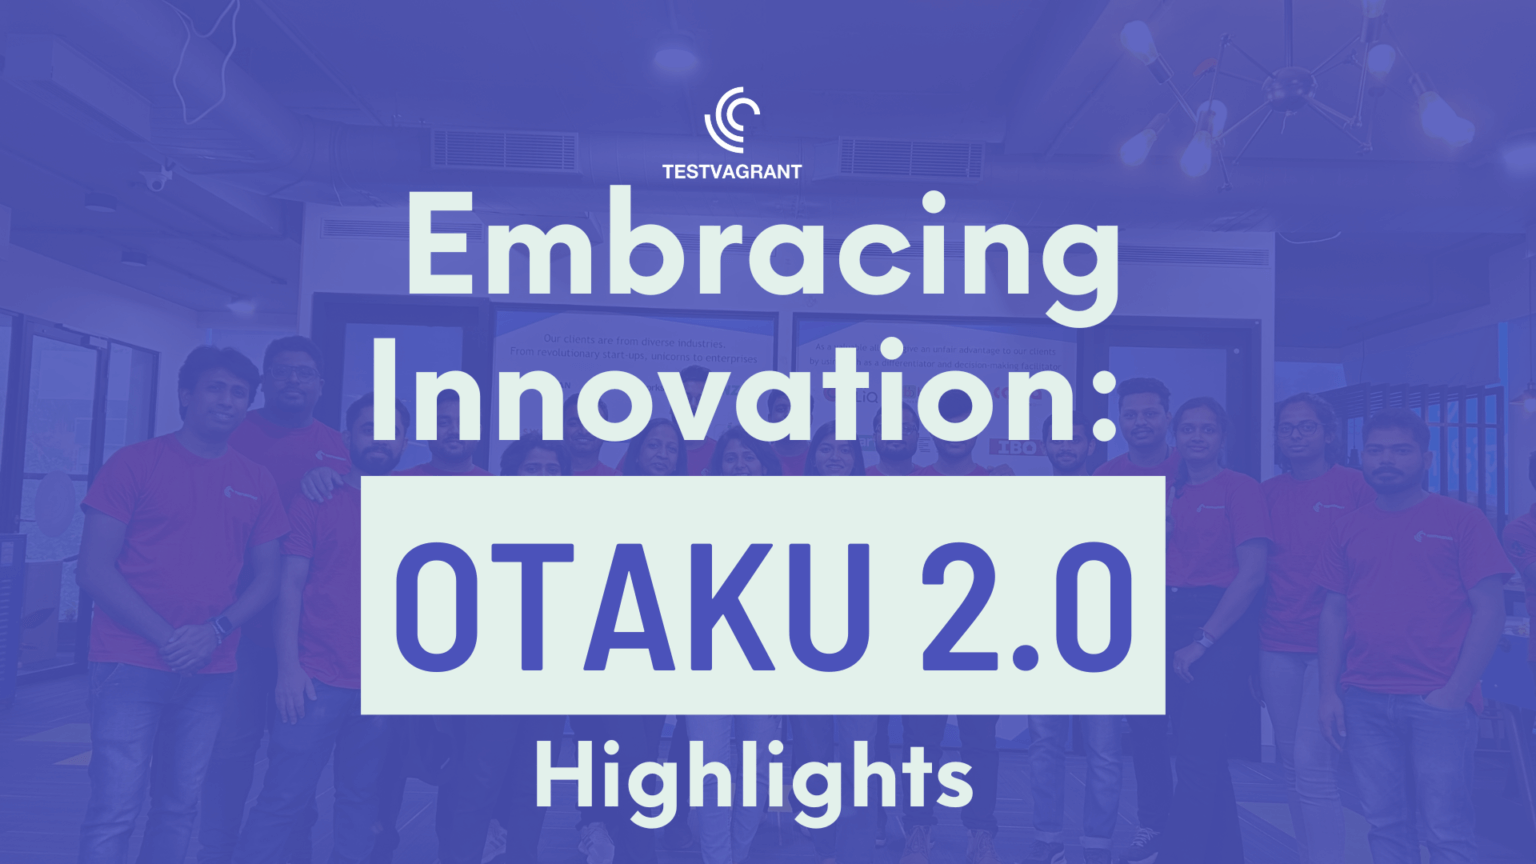
Otaku 2.0 sought to redefine the way we approach testing, celebrate the spirit of innovation, and pave the way for a brighter future in tech.